Keeping your unit in good condition is crucial. If you neglect the maintenance part, your unit will underperform and become worthless quickly. However, most people don’t know how to take care of their ice maker properly, and that can have disastrous consequences. Therefore, both scenarios are pretty bad in general.
We have made a list of 6 maintenance tips so that you can get a better insight into the whole process of cleaning and keeping the ice maker in good condition. Read the article, and you won’t have to spend countless hours in front of your PC while searching for the best way to keep your ice maker in good condition.
Inspect for Mold
The first and easiest thing you should do is inspect the machine and see if there’s any mold accumulating on the inner components. The most frequent places for finding mildew are rubber and plastic parts of the unit. If you stumble upon accumulated mold, wipe it with a wet sponge. You can use detergents, but avoid using any aggressive ones because you risk damaging the rubber components.
It’s not unusual to find mold, so don’t panic when you do. It’s a common occurrence because the temperature and humidity are perfect inside the unit for mold to grow and develop. However, it’s crucial that you thoroughly clean it because if you don’t, it only takes a couple of hours for it to grow back again.
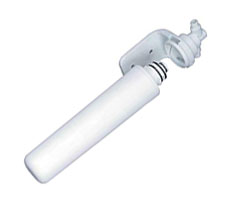
Replace the Filters on a Regular Basis
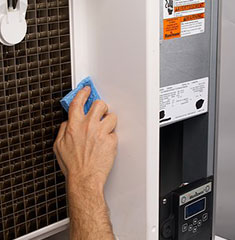
Clean it Thoroughly Every Six Months
Don’t use wet cloth
Although it’s more a matter of common sense, many people neglect this step and use wet sponges and kitchen cloths for cleaning. Because the machine is powered by electricity, it’s extremely dangerous for you to use a soaking wet sponge to clean it. The first thing you should do before every cleaning session is shut the machine down and plug it out of the socket.
After you’ve don’t that, you’ll have a much safer environment for cleaning with a wet cloth. When you finish, be sure to wait for at least an hour for the components to completely dry. When you’re sure that the unit is dry, go ahead and plug it back in.
Prevent Scale From Forming
Scale is one of the biggest enemies of every ice maker. Hard water can have devastating consequences to the inner walls of ice maker’s parts. When hard water dries, minerals like calcium and magnesium form a layer of scale which affects the productivity and integrity of your machine. To prevent the accumulation, aim for the ones that have good water filters. You can find such units by reading our reviews.
Consistency is Key
Whatever schedule you decide to follow, be sure to stay consistent, especially if you’re using the unit frequently. In fact, some models require regular maintenance every three instead of six months due to the poor quality of its components. To avoid buying a new one and spending double the money, try cleaning it more frequently, and you shouldn’t have any major issues. However, if the machine is poorly made, there’s not much you can do but to wait for it to break and purchase a new (better) one.